
vSphere:
Wondering how to enable NetFlow in VMware vSphere? Well, it’s pretty easy – you’ll need to have your collector up a running (I’m using ManageEngine’s NetFlow Analyzer trial for testing purposes https://www.manageengine.com/products/netflow/?pos=MEhome&loc=ProdMenu&cat=ITOM)
From there, let’s get into setting up NetFlow in the virtual distributed switch (VDS).
In vSphere, click on the Network icon (#1), then on your VDS (#2), click on Configure (#3) and then NetFlow (#4) – then click Edit (#5), on the right side of the panel
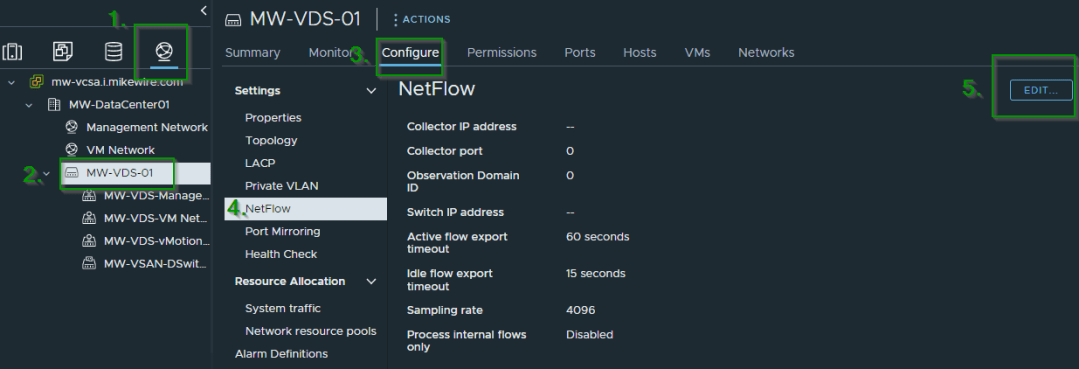
Now configure the NetFlow Settings

- Collector IP address
- Collector port
- Collector domain ID
- Switch IP address – leave it blank if you want to see multiple individual device IP’s, otherwise it is recommended to input in an IP, and the NetFlow collector will see the distributed switch as a single network device instead of as multiple devices corresponding to each host. (Note: In an IPv6 environment, the ESXi hosts ignore the switch IP address)
- These are advanced settings, leave them as is, unless specified
Then click OK to confirm.
Now we need to edit the port group settings:
Find the Port Group(s) you want to see traffic on, right click and select Edit Settings

Click on Monitoring

Change the setting from Disabled

To Enabled…

And that’s all – now you have enabled NetFlow on the VDS and the PG – assuming your collector is setup and ready to go, after a few minutes you should begin to see flows similar to what you see below:

Happy NetFlows coming in! Alright, take care and watch for the next blog!
Leave a Reply